
Hello and welcome everybody to my first step-by-step blog post!
This post is for an M&M illusion cake inspired by Amerikanisch Kochen. I made this cake for my sister's birthday and as her favourite sweets are M&Ms, I omitted the Malteasers from the cake. This cake was a bit tricky to decorate at times but I think the end result was worth all of the time and effort.
So let's get started...

- 300g of caster sugar
- 300g of butter
- 6 eggs
- 233g of self-raising flour
- 68g of cocoa powder
- 45ml of milk

The equipment needed for the cake:
- Weighing scales
- Spoon
- 2 lined 8inch cake pans
- KitchenAid
1. The first step in making the cake is to turn your oven to 190degrees/ gas mark 5.
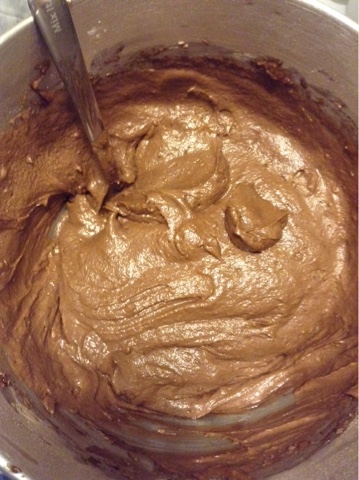
2. This recipe is an all-in-one method so it is quite easy to make, simply add all of your ingredients to the bowl and mix until the mixture is smooth.
3. When your mixture is all incorporated the next step is to divide it evenly between the two cake pans. To ensure I filled both pans evenly I like to put a tablespoon worth of mixture in each one until I've used all the mixture.
4. Now you need to pop it in the oven for 30-35 minutes until you can insert a knife and it comes out clean.
5. Once the cakes have been removed from the oven I like to take them out of the pans after about 10 minutes. Having the cakes out of the pans and exposed to the air will help them to cool quicker.
 | |
| Step 2 |
 | |
| Step 3 |
 | |
| Step 5 |
The next step is to make the icing while the cake further cools...
 The ingredients needed for the icing:
- 225g of butter
- 450g of icing sugar
- 2-3 tablespoons of cocoa powder
 The equipment needed for the icing:
- Weighing scales
- Spoon
- Palette knife (not pictured)
- KitchenAid
For the icing all you need to do is whisk all the ingredients together with a KitchenAid or electric mixer, whatever you have is fine, until the mixture is smooth and creamy.

Back to finishing the cake..
6. I levelled both layers of the cake and decided which one would go on top and which on the bottom.
7. To decorate the cake I placed four strips of greaseproof paper on my turntable and placed the first layer of the cake onto it.
8. I used my palette knife to spread the icing onto the layer and then repeated this step for the other layer of the cake.
9. I then sandwiched both of the layers together.
10. Next I covered the entire cake in the icing with my palette knife. There is no need to pipe the icing as it won't be visible when the cake is complete.
 | |
| Step 7 |
 | |
| Step 9 |
 | |
| Step 10 |
Now for the decorations; M&Ms and Chocolate Fingers.

In total I needed 3 M&M pouches and 3 boxes of chocolate fingers to decorate the cake.
When opening one of the M&M bags it's essential to cut the corner off and keep the bag intact as you will later need this to decorate the cake. To fill out my M&M bag but still keep it light, I stuffed it with the plastic wrapping from chocolate fingers.
It's very important to stick the decorations on as quick as you can before the icing begins to harden and become unsticky.
1. I began with sticking the chocolate fingers along the edge of the cake, leaving a gap in the front of the cake where the M&Ms will later cascade out of.
2. Next I stuck the M&Ms to the top of the cake trying to have as little icing showing as possible.
3. The next step is to find a sturdy and long object that you can use to create the illusion of the M&Ms tumbling from the bag. I used a plastic arrow sourced from a younger cousin's archery kit (cleaned before use of course).
3. The next step is to find a sturdy and long object that you can use to create the illusion of the M&Ms tumbling from the bag. I used a plastic arrow sourced from a younger cousin's archery kit (cleaned before use of course).
I then took the arrow and inserted it into the middle of the cake leaving the suction cup exposed at the top.
4. Once I had worked out where the arrow would go and how far up the M&Ms would I go, I removed the arrow from the cake and covered it in icing.
5. I then stuck the arrow back into the cake and started sticking the M&Ms to the arrow, starting from the bottom up.
6. When all of the M&Ms were in place on the arrow I transported the cake from the turntable to a cake board (definitely a two person job). I placed the cake towards the back of the cake board as the M&Ms would need space to pour out of the cake.
7. I took some of the buttercream and spread it down the gap in the front of the cake and onto the cake board. I tried to give it a natural spilling down appearance instead of a straight-lined edge.
8. The end is in sight! Now all you need to do is take the remaining M&Ms and stick them into the front of the cake and the buttercream on the cake board.
9. The final step is to take one of your M&M bags and balance it on top of the arrow, this is why I left the suction cup side of the arrow sticking out, it helped to hold the bag in place.
 | |
| Step 1 |
 | |
| Step 4 |
 | |
| Step 5 |


Here's what the inside of the cake looked like:


I hope you enjoyed this blog post and I definitely think you should bake this cake and treat yourself to a generous slice (or two) :)
Taste Tester's Review: The cake was moist, rich and very chocolately. The icing was lovely. Overall it is a chocoholic's dream cake.
See you again soon!
No comments:
Post a Comment